
[Ed. Note: 1/12/2015: This Disco Ball, version 4.0, is obsolete 🙂 You should check out my ultimate (!?) version, Disco Ball 6.0, here.]
[Ed. Note: 11/18/2010: As awesome as this Disco Ball 4.0 costume is – it is obsolete 🙂 You should check out my new and improved, crazy awesome DISCO BALL 5.0! ]
[Ed. Note: what follows is me geeking out on making a Halloween costume 🙂 if that is boring, just check out the pics or read the post about how Halloween went down in the Castro)]
or
Click here to jump straight to my “Making of Disco ball 4.0” PICTURES
So earlier this year, I decided to pop on my Disco Ball 3.0 costume and roam the streets for a friend’s Birthday bash – very quickly I learned two things:
- Just popping on Disco Ball 3.0 and randomly roaming the street playing music is a BLAST!!! (here is a movie of 3.0 in action so you get the idea – sorry no movie of 4.0 :-()
- Disco Ball 3.0 was a bit of a pain to deal with!
Clearly, at some point I needed to revisit the costume & do it better! Basically, the problems were that it needed to be more durable (it got scuffed up easily), it could look better, & it was hard to get into and out of. There had to be a better way I thought & it was too much fun to leave behind.
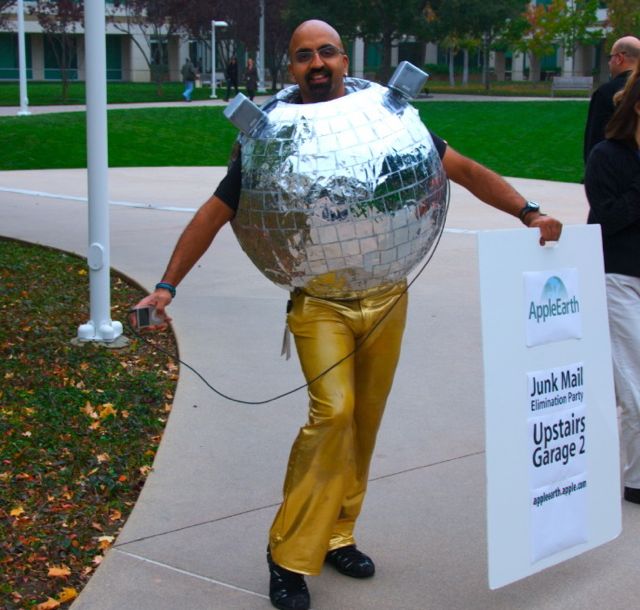
So a few months went by and I was contacted by a woman who wanted to make spherical costumes for her kids (what a dedicated mom!) and asked me for advice. This actually happens fairly regularly, though usually around Halloween (for example here are some Australian Disco Ballers I helped, dancing at their company party. They look like Disco Ball 2.0 designs (paper maché) without the speakers). Anyway, this woman, a doctor, emailed me back to say that instead of paper maché, she used cast plaster & it was MUCH easier to deal with & that it was much sturdier!
Wooo!!!! (Thank you thank you Ann!) Paper maché gave me the best looking ball but had many problems:
- it was waaaaay too flimsy
- it was really messy to work with
- it required a LOT of layers, which took a lot of time
- and worst of all, you had to hope the balloon didn’t pop, deflate, or change size (humidity changes I think) in the days it took to put all the coats of paper maché on
Using paper maché, I had to also coat the inside with spray insulation to make the costume strong & this was a pain, and the resulting costume was never as strong as the pourable foam Disco Ball 3.0. But I realized plaster could solve all of that.
I went to the art supply store & found that they sold this awesome plaster-infused gauze called Rigid Wrap & bought a small amount & a small balloon & tested it out. I quickly covered the balloon (Rigid Wrap rocks!) and the exterior was nice and hard – it only took about 30 minutes! I knew this would work! More importantly, this marked the passing from the “curious about costume idea” phase into the “excited to make costume” phase – which is always critical! 🙂
I also realized though that as hard as the plaster was, it would still be relatively weak when it was blown up to Disco-Ball-person size. So I decided that I would put a couple of layers on. So I blew up the big balloon & got plastering. It was super fun to work with the Rigid Wrap – I just cut up triangles (they lay flat on curved surfaces) & got messy.
After 2 layers, I popped the balloon & stepped back – it looked AWESOME. This would have been fine for a casual Disco Ball 🙂 but given that I was going to put a heavy speaker system in there & I would be roving through parties with drunk people and packed dance floors, I needed sturdy!
I needed the sturdiness of the pourable foam Disco Ball 3.0. This is when inspiration struck again, I could just pour the foam into the insides of the new Disco Ball & let it form a thick, hard, inner shell! Brilliant! This effectively gave me all the upsides of Disco Ball 2.0 (nice shape) and all the upsides of Disco Ball 3.0 (seriously sturdy costume) without any of the MANY downsides of pourable foam (hard to make a mold, gets everywhere, sticks to everything, destroys homes, attacks children, covers body with painful hard plastic, votes Republican – you get the idea).
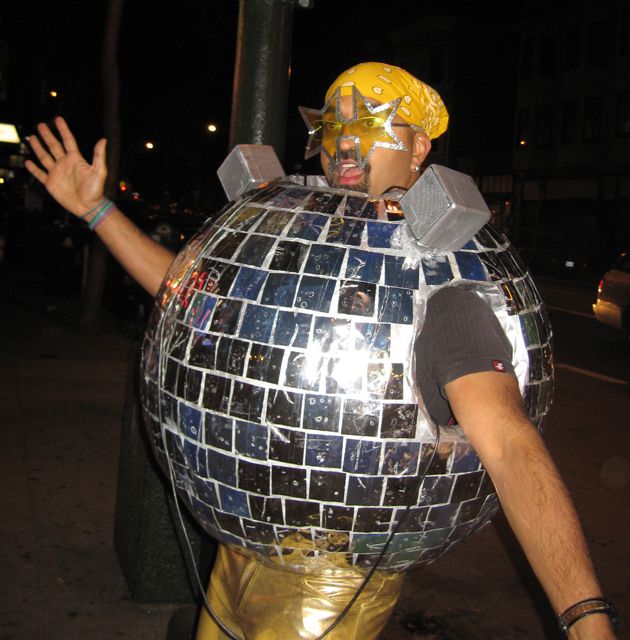
Anyway, I bought a small amout of the foam, poured it on the inside of the costume & it worked BRILLIANTLY! Suddenly the ball looked good & was super strong! Disco Ball 4.0 was mostly just details after that! (remember: here are the pics of all this “making of” madness) I then:
- Cut the holes for my arms & head & reinforced all four holes with lots of duct tape to make them sturdy
- Painted ball silver this year like Disco Ball 2.0 (that one looked better in daylight – but I’m torn: Disco Ball 3.0 may have looked more like a Disco Ball – opinions?)
- Attached the speaker mounts with zip ties & spray painted them and the speakers silver
- Cut up tons of mylar squares & spray mounted them on
A few other significant things to improve the costume were:
- I also used some more pourable foam to mount the speaker system: 3.0’s speaker system kept falling out & was a pain to mount in the ball. I should have done this even better than what is pictured, I covered the components in foil & set them into the hardening foam where I wanted them. I should have placed the batteries closer to where they attached & I should have used more foam to surround them – they still all fell out too easily. Luckily I can add this later.
- I made some padded shoulder mounts out of soft foam from last year’s dinosaur costume to make Disco Ball 4.0 much more comfortable to carry around on my shoulders.
- The other big innovation is that I covered all the mylar squares with long strips of clear packing tape. This made HUGE difference because the squares got pulled off easily & damaged and scuffed all the time with Disco Ball 3.0. This made the whole costume look MUCH better & hopefully stay good looking much longer…
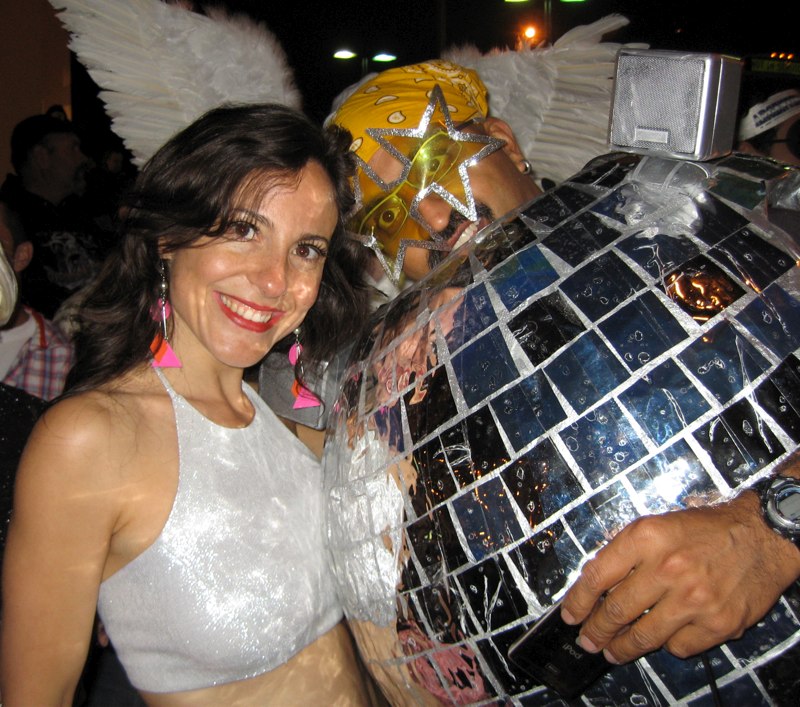
Voilá – Disco Ball 4.0! My best Disco ball ever – I’m very very happy with it & expect to be roaming the streets of San Francisco with it often 🙂
Update (10/16/09): Since a lot of people have asked, I got the balloon at a local party store. They sell 3 ft. balloons. Also, I bought the mylar at TAP Plastics a local chain, but you can probably find it at a hobby shop?
Update (10/21/10): Since folks have asked, I’ve put some basic cost guess-timates in the comments. Also, FYI, I’m building Disco Ball 5.0 – so check back in a few weeks!
Update (11/18/10): 2 things: 1) for more details on how to make a Disco Ball, make sure you read the comments here, and 2) DISCO BALL 5.0 ROCKED – check it out here!
Hey deep
It looks fantastic! Yea for rigid wrap!
I have an idea for the speakers, if you should do a 4.0: cut wholes in the ball itself so that the speakers look like just another “mirror” square. Do you know what I mean? Then you won’t have the speakers on your shoulders.
aim
i ve done a perfect discoball i have some photos sent me your email and many thanks for tha plans…
Oh my gosh!! this is AMAZING!!
I am having my 30th in a few weeks and I wanted to go as a mirror ball (theme is 70s, 80s, disco and/or retro!) as I am a complete glitter retro freak, but I was thinking about using material and hula hoops (as I was thinking I needed movement to hug people etc)… but you look so extremely awesome and your instructions are so fantastic… that I may just have to make one like yours! Thanks so much for putting your instructions up on the web. and I loved the other australians at their company party! so cool!!
anyway, thanks again. i will send you photos if I end up getting the chance to make one!
🙂 jacquie (australia)
question were do you get the mylar papper
Thanks so much for your help!!!
i really want to make your coatume….wear did u get speakers and a sub from….i cant seem to find a store with ballons as big as 3 ft any suggestions?
So, I’m planning to be a cocktail olive for Halloween, but couldn’t figure out for the life of me how to do it…until I found your site! What type of balloon do you use for the mold? Any suggestions on where I could find one? Thanks SO much!! 🙂
Where can you get pourable foam from? Would Home Depot or somewhere like that carry it?
The mylar paper and 3ft balloon I was able to pick up at Party City store
What did you use to cut holes in the plaster once it hardened?
Love your plans for the disco ball – thank you for sharing. 🙂 What was the estimated cost for making your ball?
Hmmm – the total cost of Disco Ball 4 – um dunno – maybe $100 – $125. The foam is expensive and the plaster stuff cost a bit. The speakers are another $100 maybe.
This year I’m making Disco Ball 5.0 – check back in a week or two for pix!
Jen – Just your normal box-cutter / utility knife.
Thanks! I ended up using a sharp pair of scissors. I am looking forward to seeing disco ball 5.0! I will send you a picture of my disco ball costume, which is coming out great thanks to your instructions 🙂
Also FYI- I bought self adhesive mylar mirrors. They come in a 4×4 square so I just cut them in quarters. They were so easy to cut and apply!
Here’s the link: http://www.shopgetorganized.com/item/self_adhesive_mirror_tiles/27704
You’ll need about 4-5 packs to cover the disco ball.
Instead of the pourable foam I used spray foam. Which can be purchased at home depot or Lowes. And it $4 bucks a can I used two cans http://www.homedepot.com/h_d1/N-5yc1vZ1xgf/R-100003351/h_d2/ProductDisplay?langId=-1&storeId=10051&catalogId=10053
I bought the Mylar paper at Party City for about $4 bucks for for 10 sheets and cut them into squares then the spray adhesive at Michaels craft store for $6 a bottle and you only need one. I also saw someone else posted the self adhesive mirror tiles ~ Wish I knew about that one sooner http://www.taylorgifts.com/item/self_adhesive_mirror_tiles/27704
Yes – the spray foam is good (though it gets everywhere!) I used it on the 2.0 of this costume:
http://www.deeptrouble.com/pixpages/halloween01/index.html
The only downside is that it is not as durable, which matters if you wear the costume a lot & also have heavy speakers inside it 🙂
Please do post pics of your costume Carla & others!!
I can’t wait to see!
In Five Below they had an IPOD speakers with disco strobe lights for $5 (YOU NEED TO HAVE AN IPOD)
http://www.fivebelow.com/media/ipod_accessories
Working on cutting the Mylars and putting them on~ I find that this is the hardest part!!!!
were can I get the speakers and sub? battery pack?….help please!
Just a question, where would I find such a huge balloon?
How much rigid wrap did you need?
How many boxes of rigid wrap did you need and what did you use to coat it – plaster you bought or did you use flour and water?