[Ed. Note: I delayed this post way too long, but I was busy & then recovering from too much Fall-crazy. I hope you enjoy it nonetheless 🙂
- For reference, here are my posts on the previous Disco Balls: 2010, 2007, 2005, 2001, 1997.
- This post contains a few shots from my two Flickr albums of the project, but there are more there if’n you’re interested – go to “the Making Of“ or “The Best of“ Albums on Flickr.
- If you’re looking for an easier version of this costume to make, do checkout 2007‘s version or 2010‘s :-)]
I have been making Disco Ball costumes on & off for 17 years now (!) this might be the final chapter.
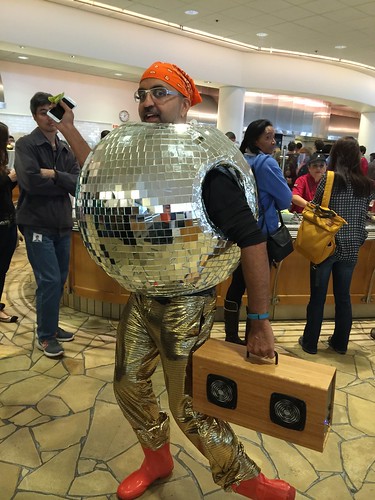
I don’t think it can get any discoballier! Disco Ball 6.0 was… well, see for yourself:
About a year or two ago, it seemed like every friend I had on Facebook decided to tell me about this woman, Natalina’s, bad-ass disco ball helmet that she posted on The Instructables.
And so, being interested in disco ball technology, I read her post & was amazed. She and her helmet were, in fact, bad-ass. She had taken disco ball costumery where I had dared not go: into making her helmet an actual disco ball.
I had considered the idea, back when I was contemplating 2010’s Disco Ball 5.0, but decided that it would be way too expensive and too heavy. But after seeing how good her helmet looked, I was seriously intrigued. But still, was it really time to do it again?
On top of the inspiring work by Natalina, there was another issue. The hulking body of Disco Ball 5.0 was sitting at the back of my house, slowly falling to pieces. The hard-plastic mylar squares were falling off & the body was starting to fall apart. This meant that I couldn’t just casually whip on my Disco Ball costume whenever I wanted, which was a major goal of Disco Balls 4.0 & 5.0….
The final straw was the fact that I was exhausted. This year, I had worked my ass off on local political campaigns & work was fairly intense. There was no enthusiasm in me for anything other than sure-fire awesome. And Disco Balls are sure-fire awesome.
So DISCO BALL 6.0 was a GO.
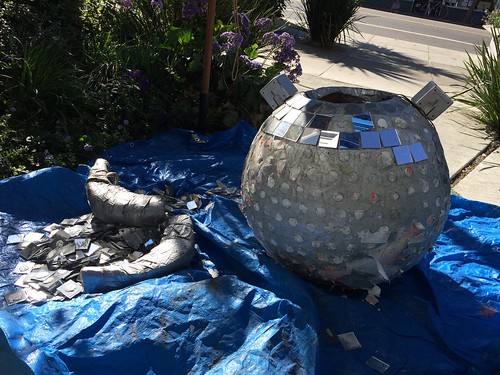
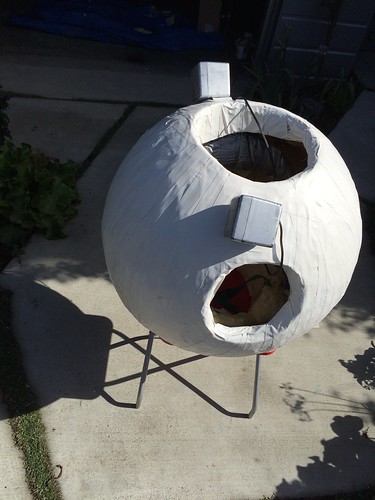
Luckily, the ball I had made out of plaster & pourable foam for Disco Ball 4.0 and reused in Disco Ball 5.0 was still basically solid. (If you want details on how I made the ball itself, go to the 4.0 page.) I ripped off all the mylar squares that made up 5.0 & then covered it with white gaffer’s tape. This solved one of the biggest problems that Disco Ball had: the glue used to affix the mylar squares basically attached to the spray paint layer on the ball’s surface. This meant that the squares came off easily, either by pulling off the paint, or just being attached to a relatively smooth, slick surface. The gaffer’s tape made a better attachment point for the glue for the new Disco Ball.
After covering the ball in tape, it looked much better. I also realized very quickly that the new glass squares I’d be putting on would be MUCH heavier than the previous versions of the Disco Ball. This meant I’d have to shore up the ball to make it stronger: the ball was already cracking around the base from where the weight of the whole thing would settle when the costume was just sitting around. So I got more pourable foam from TAP & built up the base more (messily as ever – the foam is unforgiving!)
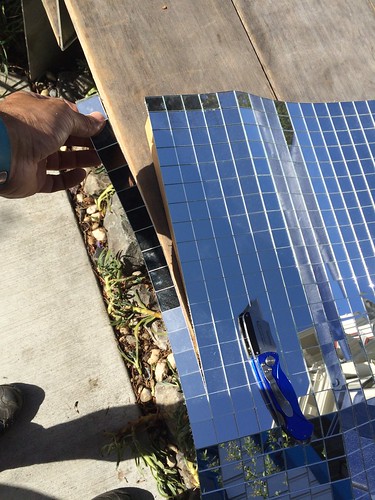
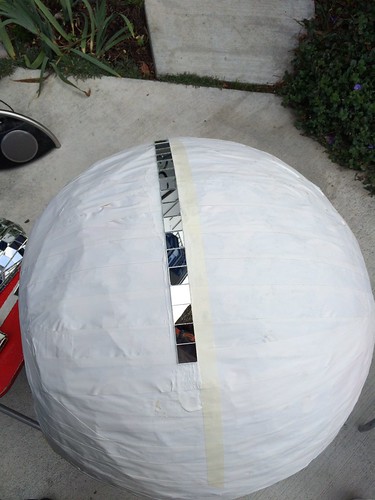
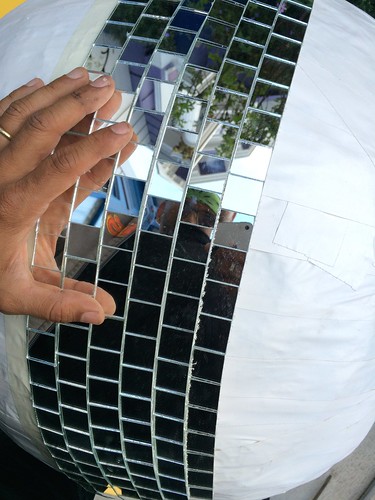
With the ball done, the task moved to getting the glass squares onto the ball. This was fairly straightforward, if time consuming. Natalina’s description on the Instructables of her efforts to do so precisely for the best effect were a big help. The glass tiles come in square shaped sheets, & as she recommended, I cut each sheet into strips. I decided to use the mirror tile adhesive from the same company, Kit Kraft, who sold the glass because another problem Disco Ball 5.0 had was that the adhesive I used seemed to eat away at the coating of silver on the tiles, over time.
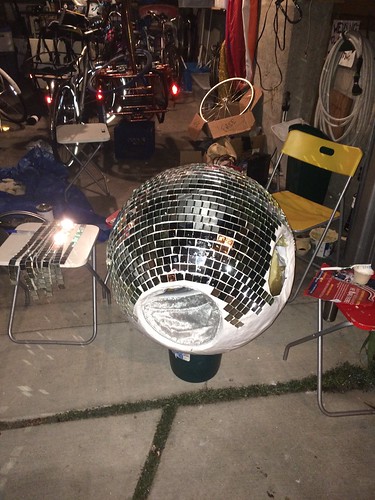
So attaching the tiles was a matter of starting at the equator of the ball & making one whole row, gluing the strips all the way around. I was careful to get the initial row just right since all other rows would be based of it. From there, I’d attach the next row all the way around one tile higher & then the next etc etc. Each row would be shifted over half a tile to make the disco ball effect more pronounced, like you see on an actual disco ball.
The hard parts were the armholes & the tops and bottoms.
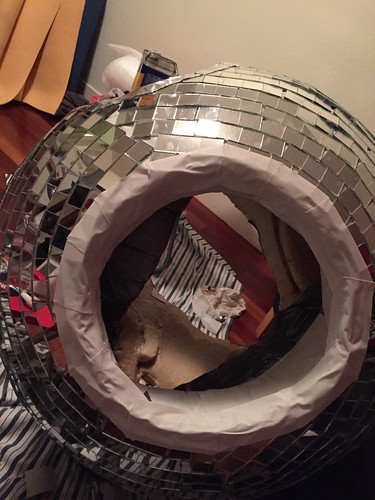
Given how sharp real glass is, I wanted to prevent any tiles from being to close to the arm holes. The first thing I did to deal with this was to leave a sizable gap area, where the gaffer’s tape would show through, around each armhole.
The top & bottom were hard because as you got closer to the top (or bottom), it became impossible to have the row of mirrors both lie against the previous row and also lie flat. The topologics of trying to plate a sphere with rectangular strips means that one of these two imperatives would have to give. Thus, around the top and bottom, things got messy and I’d cut individual tiles and place them where I could, to best keep the Disco Ball looking good. I was also counting on the fact that people would look at the very top & very bottom carefully.
Also, similar to the arm hole problem above, I didn’t want my neck or waist too close to the glass tile edges, so again I left a gap area around those spots as well.
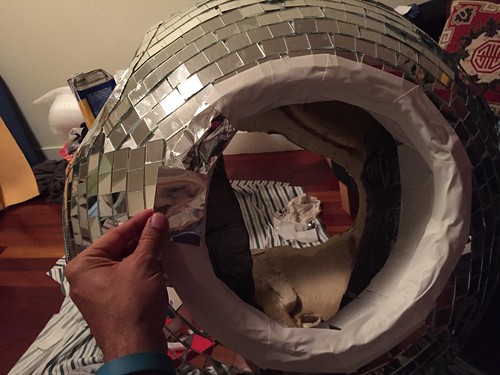
After finishing the full coverage, I then went back to deal with the arm, neck & waist gaps. First I covered all the actual edges of the the tiles near these holes with strips of thick gaffer’s tape.
Then, I covered them again with a silver metal “tape” I found at the hardware store. It is not duct tape (though a similar size) but rather some sort of actual metal made into tape. I believe it is used for ducting. I used small strips of this, as pictured to hide the white gaffer’s tape & the gap. Thus I would be safe from the sharp edges of the glass tiles, as would any handsy onlookers. 🙂
As I began to assemble all this, it became really clear to me that this would be a really truly heavy costume, which meant that it was time to remove the sound system as well. This was a bit of a bummer, but it did have the advantage of making the Disco Ball look even purer…. I used a portable BlueTooth boombox & my iPhone, to provide the sound…
After that it was a matter of just adding in the shoulder pads (actually I had strung twine in loops through the shell of the ball, before I put the mirrors on). The shoulder pads were just C shaped chunks of foam wrapped in duct tape that I made for Disco Ball 5.0. They help a lot when wearing the heavy costume.
And that was that. This year’s Disco Ball looked and felt AWESOME. Yes it was heavy, but it was manageable.
It looked FANTASTIC. This time it wasn’t really a Disco Ball costume, but rather I was an ACTUAL DISCO BALL. SO. MUCH. FUN.
.ps My favorite other costume this year was this GREAT dino costume made by Sam Haynor. I *LOVE* it. This video doesn’t even do it justice, but suffice to say, I’ll probably try to make a version of it in the years to come 🙂 Sam – you ROCK!

